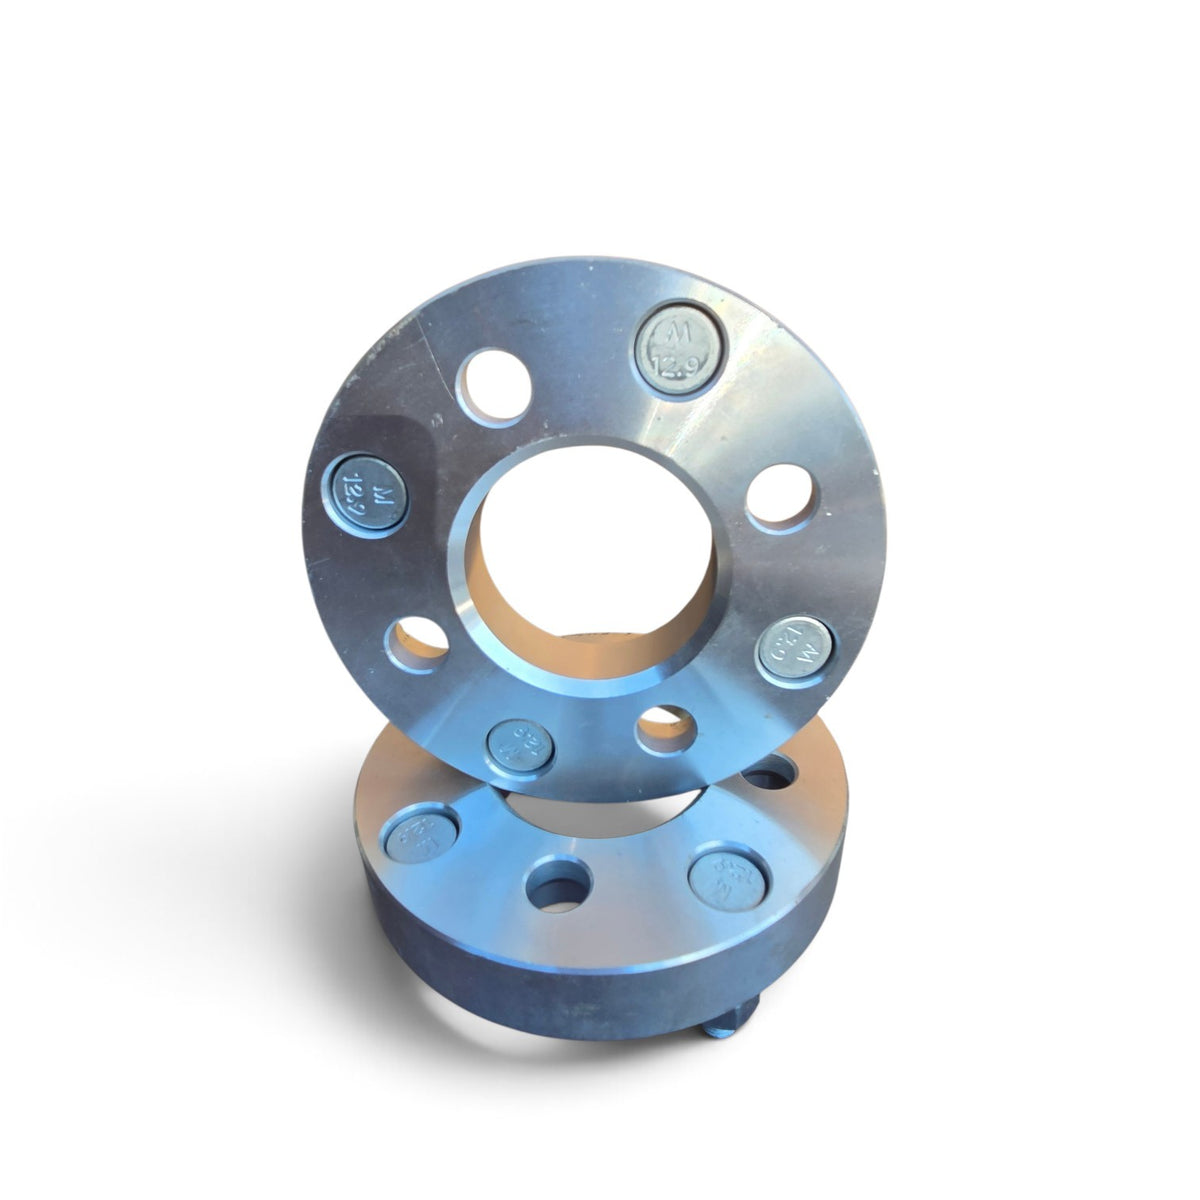
4x110mm Hub to 4x110mm Wheel Pattern
Add extra wheel clearance and spacing with these 4x110mm wheel spacers. Designed for vehicles and ATVs with a 4x110mm bolt pattern, these spacers maintain the original 4x110mm wheel pattern while moving the wheel outward from the hub.
Each spacer is CNC-machined from billet aluminum for accurate fitment and reliable strength. New wheel studs are included.
Available in 1-inch and 2-inch thickness options to accommodate different wheel and clearance requirements.
Sold as a pair — 2 spacers.
Product Specifications
| Specification |
Details |
| Hub Bolt Pattern |
4x110mm |
| Wheel Bolt Pattern |
4x110mm |
| Center Bore |
76.2mm |
| Stud Thread |
10x1.25 |
| Thickness Options |
1" or 2" |
| Material |
CNC-Machined Billet Aluminum |
| Includes |
New Wheel Studs |
| Sold As |
Pair — 2 Pieces |
Product Description
These 4x110mm wheel spacers are designed for ATVs and vehicles using a 4x110mm bolt pattern. Because the hub and wheel patterns are the same, the spacer does not change the bolt pattern. Instead, it increases the distance between the wheel and hub.
Wheel spacers can be used to provide additional clearance between the wheel and components such as the brakes, suspension, or other nearby parts, depending on your specific setup.
Choose between 1-inch or 2-inch thickness based on the clearance and wheel position required for your application.
Please verify your vehicle's bolt pattern, center bore, stud specifications, wheel clearance, and required spacer thickness before ordering.
Installation Instructions
-
Remove the existing wheel and clean the hub mounting surface. Make sure there is no dirt, rust, grease, or debris that could prevent the spacer from sitting flat.
-
Install the spacer onto the factory 4x110mm hub and make sure it sits completely flush against the hub.
- Install the spacer hardware and hand-tighten the nuts first.
- Tighten the spacer nuts gradually using a crisscross/star pattern so the spacer seats evenly.
- Torque the spacer hardware to the recommended specification for your vehicle and the hardware being used.
- Install the 4x110mm wheel onto the new studs supplied with the spacers.
- Tighten the wheel nuts in a crisscross/star pattern, then torque them to the wheel or vehicle manufacturer's recommended specification.
- Before driving or riding, check that the wheel rotates freely and that there is adequate clearance around the brakes, suspension, steering components, fenders, and other parts.
Important Wheel Stud Clearance
Before installing your wheels, check the length of the factory hub studs.
Depending on the vehicle, the original studs may extend through the spacer far enough to contact the back of the wheel. If this happens, the wheel may not sit completely flat against the spacer.
Do not force the wheel into position. If the factory studs interfere with the back of the wheel, they may need to be shortened to provide proper clearance.
The wheel must sit completely flush against the spacer before the wheel nuts are tightened.
Check Before Driving or Riding
- The spacer sits completely flat against the hub.
- The wheel sits completely flat against the spacer.
- Factory studs do not interfere with the back of the wheel.
- Wheel nuts have sufficient thread engagement.
- The wheel rotates freely with no rubbing.
- There is adequate clearance around brakes, suspension, steering, and fenders.
- All hardware is properly torqued.
If you are unsure about spacer fitment, stud clearance, or installation, professional installation is recommended.